Installing BON in a Box
The instructions for how to install BON in a Box on your computer can be found here.
Start BON in a Box
- Start the services by running
./server-up.shin a Linux terminal (e.g. Git Bash or WSL on Windows or Terminal on Mac). Make sure you are in the bon-in-a-box-pipeline directory on your computer. - Open a web browser and navigate to http://localhost/ for a local setup, or the instance’s address on the web if hosted on a server.
User Guide
Here is a detailed guide on how to run BON in a Box locally on your computer. This guide outlines the features of BON in a Box and how to use them.
Home
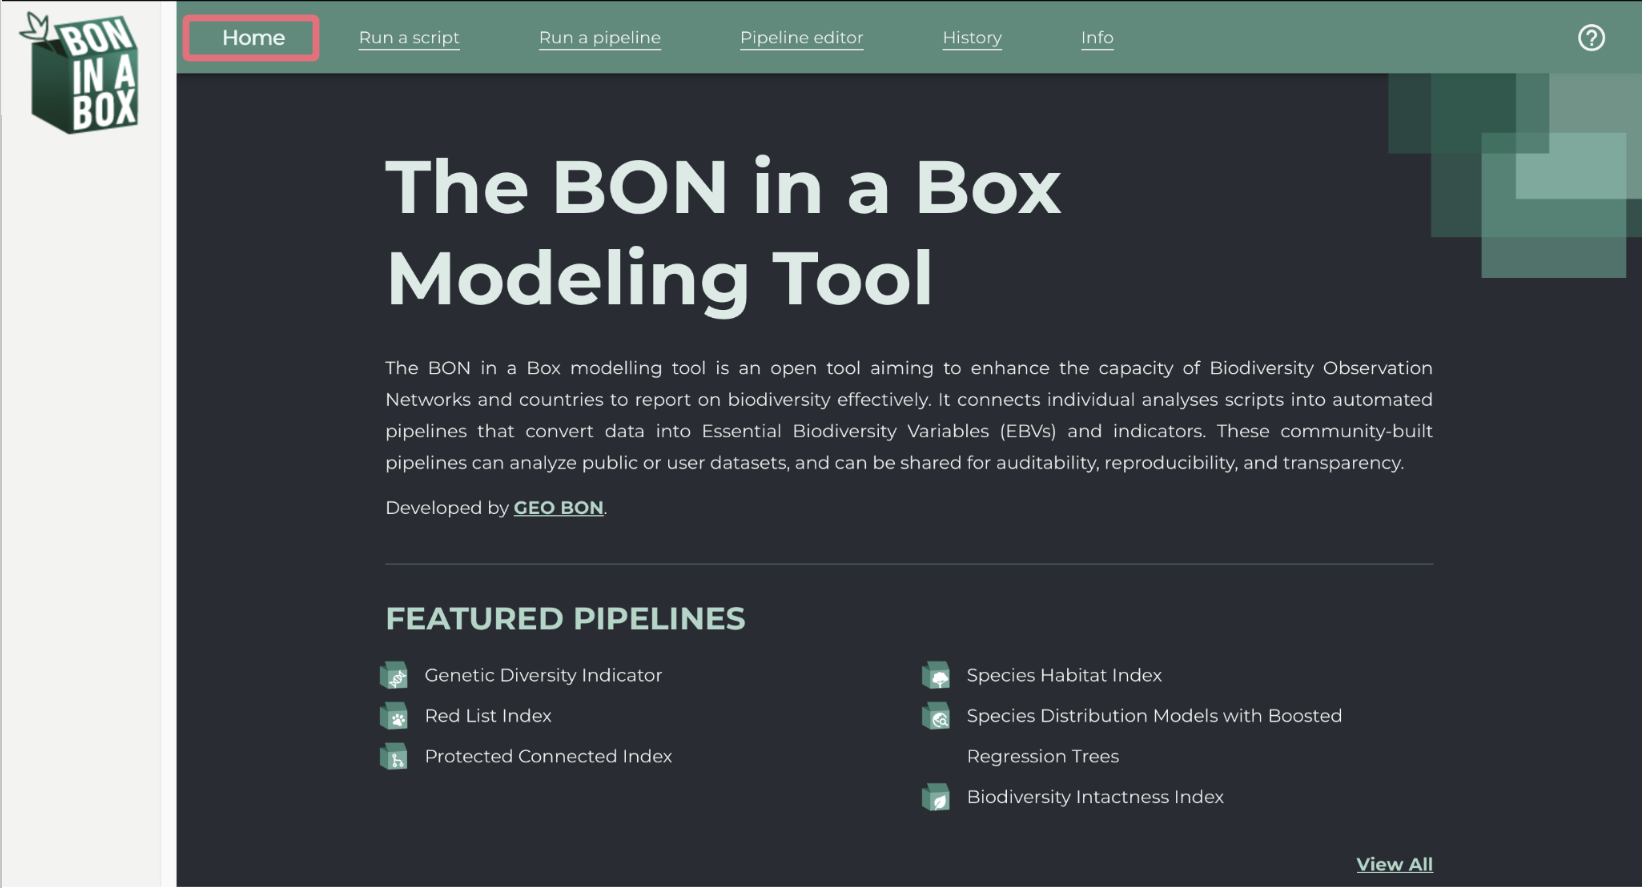
Under the Home tab, you will find a description of the BON in a Box modeling tool, as well as its featured pipelines. And your most recent pipeline runs.
Run a pipeline
The Run a pipeline tab can be used to run an entire pipeline to calculate an indicator or EBV. Pipelines run a full sequence of connected scripts and are designed to carry out a full analysis from start to finish. Each pipeline integrates multiple steps like pulling data, cleaning data, performing analyses, and plotting and formatting outputs into one automated workflow.
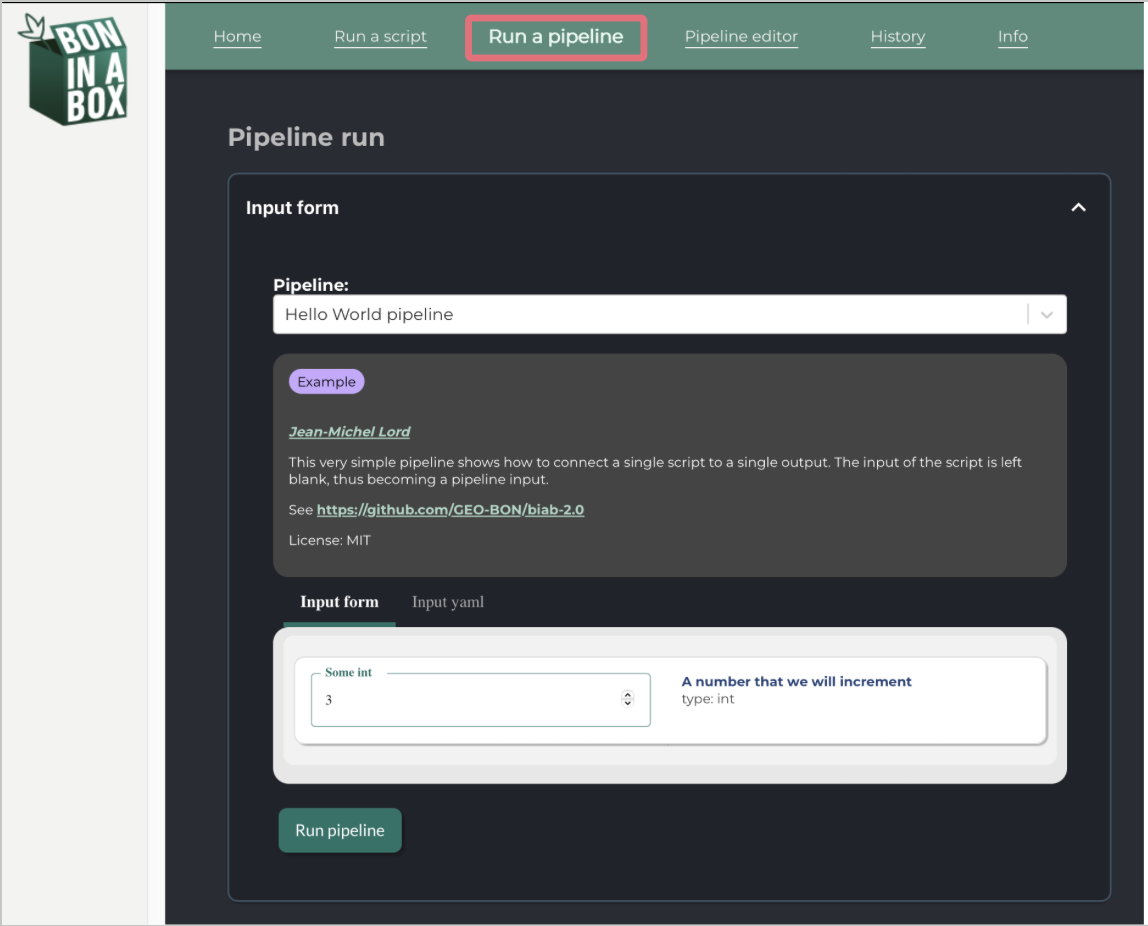
Select from the drop down menu the pipeline you would like to run.
- Once the pipeline is selected, there will be a description of the pipeline, with its authors and references.
- Each pipeline will have a tag indicating whether it is still being developed, in review, or peer reviewed.
Fill out the form with the input parameters the pipeline should use.
The pipeline will run with the default parameters, so you can run the pipeline right away to see what the outputs should look like.
Some inputs can be typed in, while others are in a drop down menu.
Each input field includes a description and its purpose on the right of the input box. Here you will also see the type of the input.
Please ensure each input matches the required type that is specified in the input description. The input will either be a primitive type (i.e. text, int, float, boolean, etc.) which the user will type in or a MIME type representing a file (e.g. text/csv, application/geo+json, etc.) where the user will provide the path to that file. The square brackets
[]after a type represent an array of that type, meaning you can input several parameters separated by a comma (i.e. text[], application/geo+json[], etc.). For more details on input types, please refer to “Step 3: Create a YAML File” on this page.The form might ask you for a file. In order to provide a file that you have locally on your computer, upload or copy it to the
userdatafolder. You can then refer to it with a url as such:/userdata/myFile.shp, or/userdata/myFolder/myFile.shpif there are subfolders. Most pipelines can also accept remote files (https://). That will be specified in the input documentation.The
Input yamltab can be used to see how your inputs are being passed in to the pipeline. This is useful for sharing pipeline inputs for recreating results, as it can be copied and pasted to fill the input form. By scrolling down, you can also see how the inputs were defined by the author(s).
Click on
Run pipeline. To terminate the execution of the script at any point, use theStopbutton. If the pipeline or any of its steps has previously been run with the exact same inputs and the code has not changed, the existing results will be loaded.
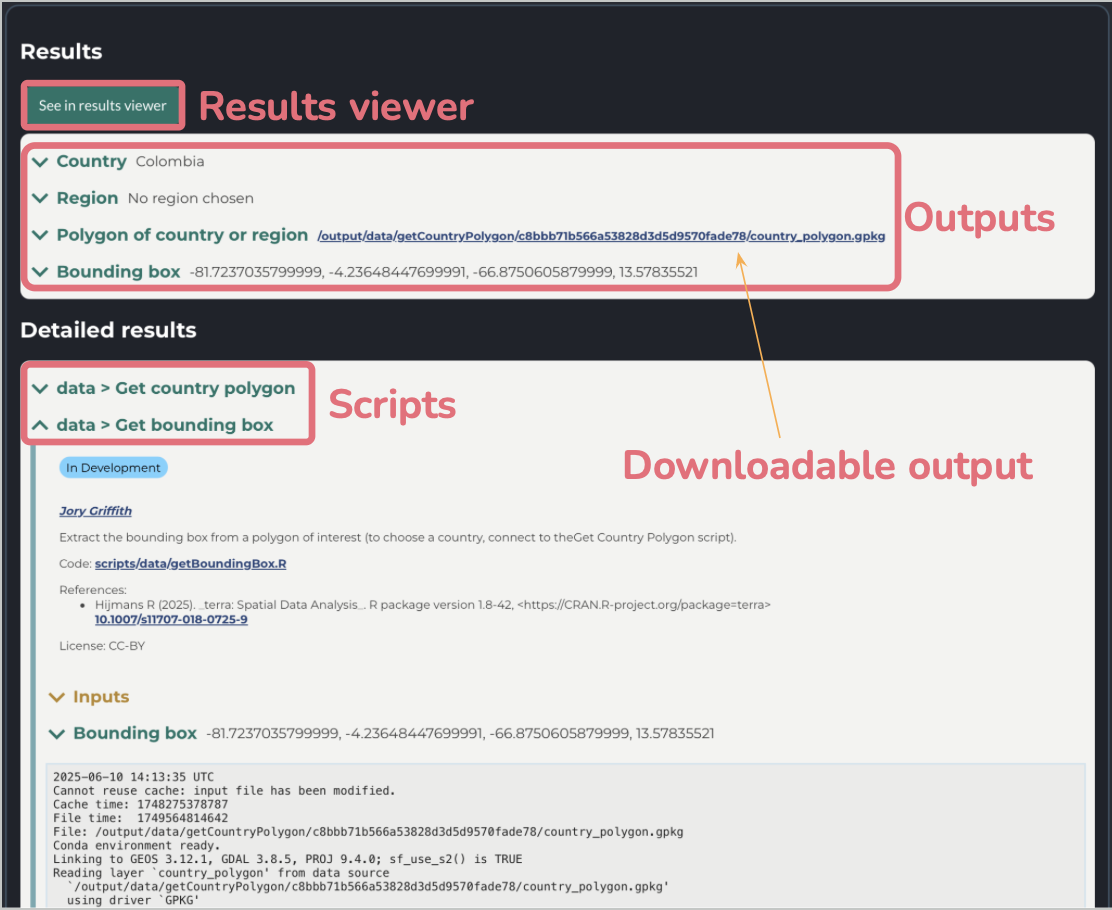
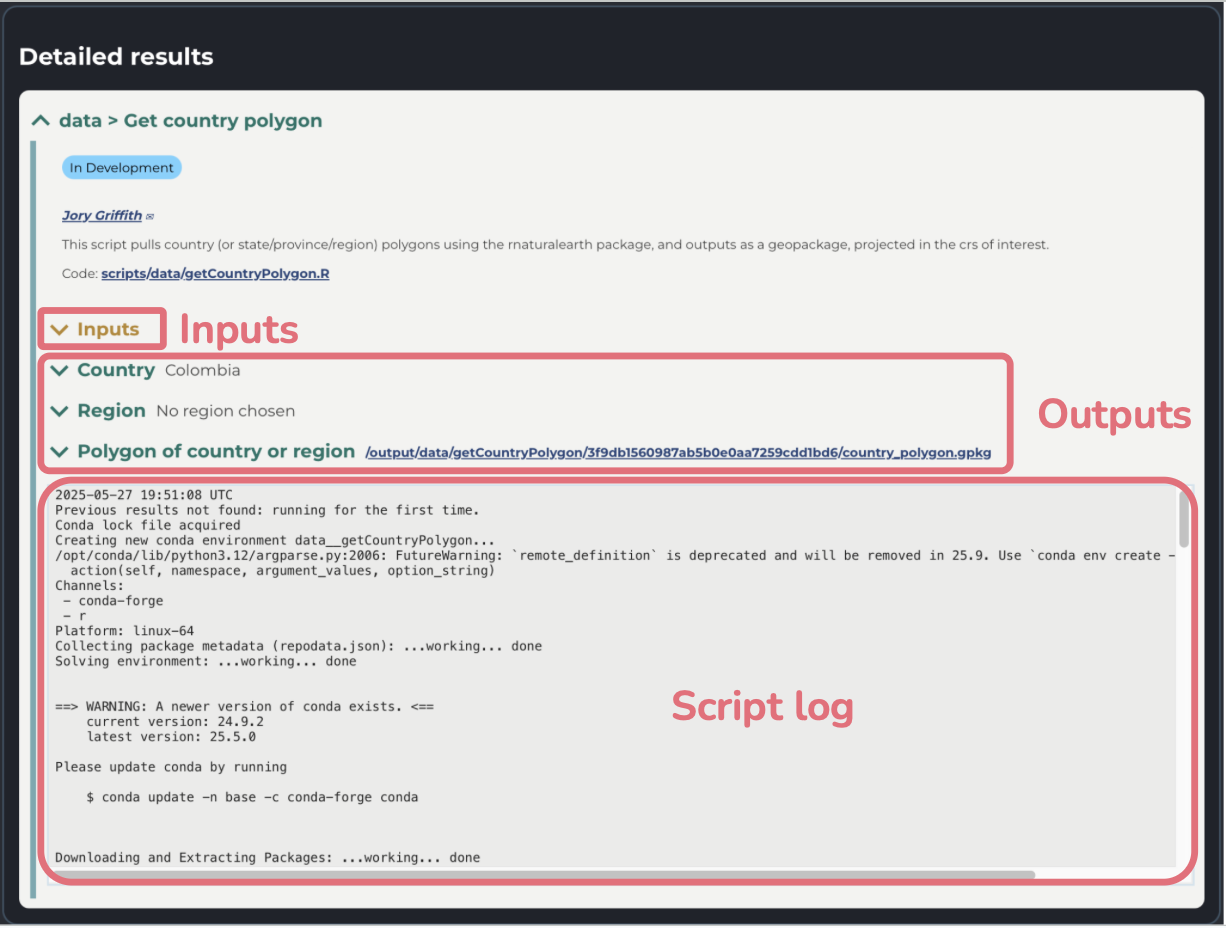
After the script runs, you’ll see a detailed Results box, which includes drop down arrows to view your inputs and script outputs. To simply view your output, click on the blue name or arrow. A gray box containing the logs of each individual script can be found under the outputs, where you can monitor the progress of the script. The logs also help with any debugging problems that occurred.
You can view the results using the drop down menu for each, or use See in results viewer for a more detailed and user-friendly (less technical) view of the outputs. Outputs can be downloaded by using the blue link next to the output name.
In the Detailed results you will find all the individual scripts used throughout the pipeline, as well as their inputs and outputs.
Run a script
The Run a script tab lets you run an individual script and works very similarly to the Run a pipeline tab. Scripts are individual parts of pipelines designed to perform one well-defined task at a time, like extracting data from a file, cleaning files, or applying a specific formulas.
The Run a script functionality is normally used for testing individual components of a pipeline rather than producing usable outputs. Additionally, unlike pipelines, scripts often require inputs that are produced by other scripts, and so they may not run successfully with the default parameters. However, running a script can be useful for development, bug fixing, or trying to understand the purpose and outputs of a given step.
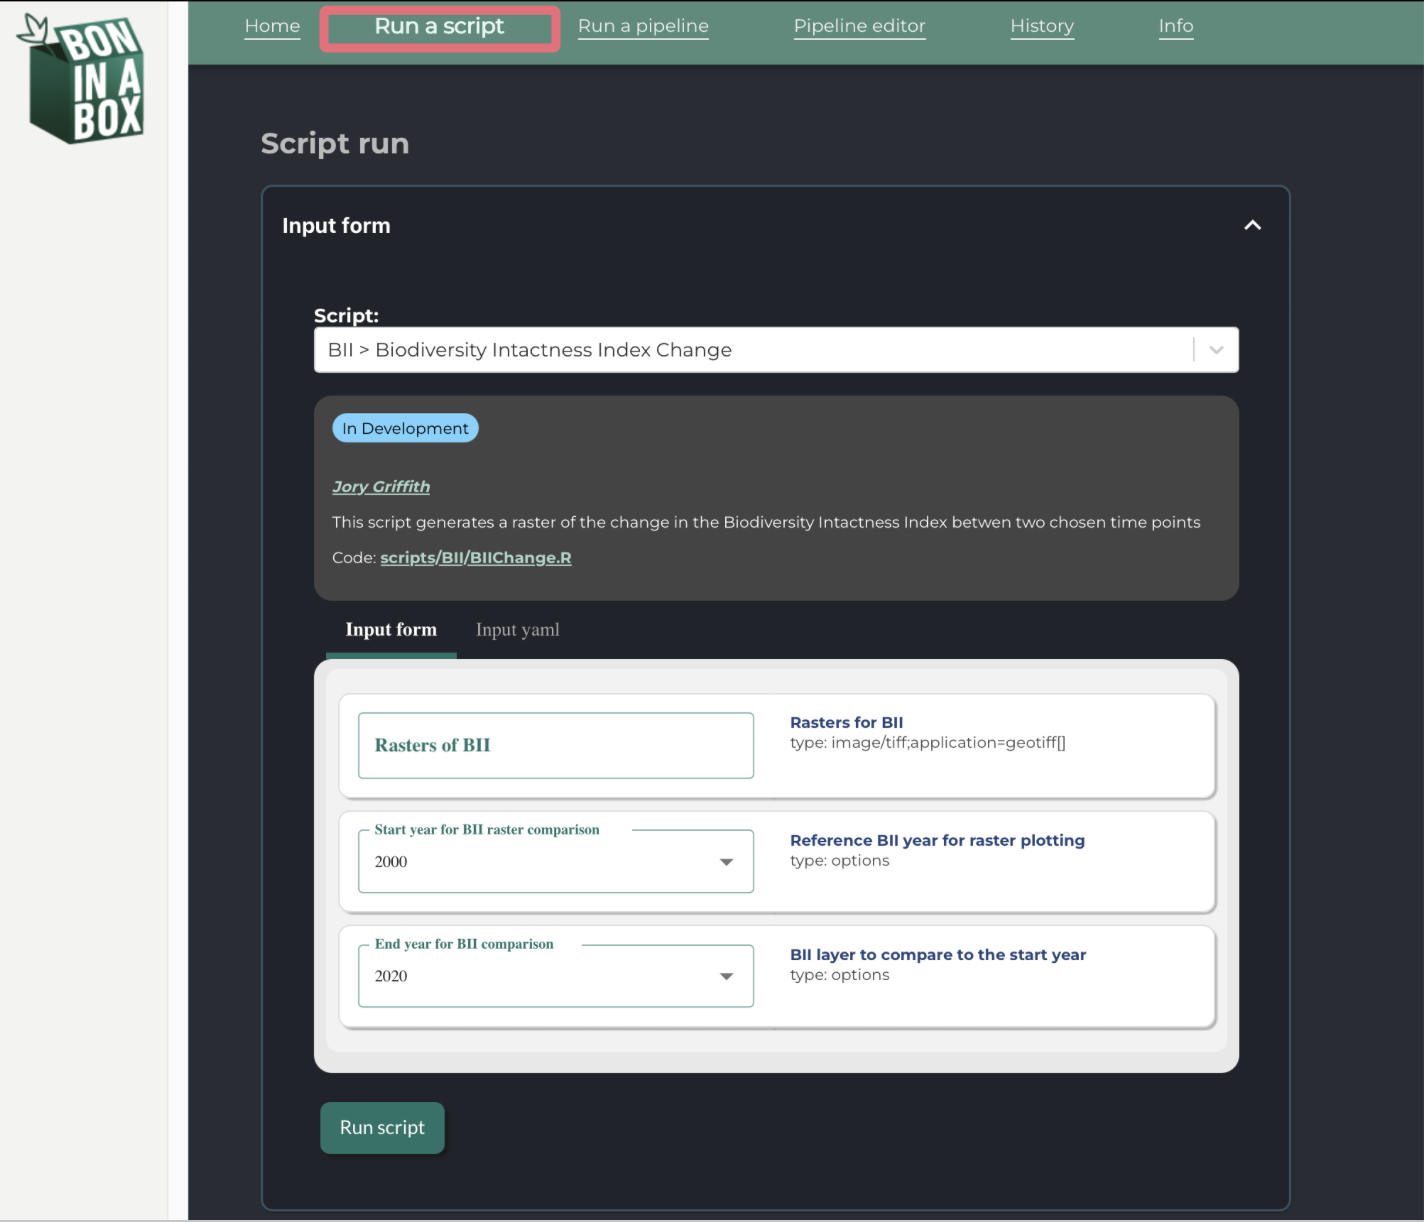
Simply fill out the desired inputs and click on Run script. To terminate the execution of the pipeline at any point, use the stop button. While the pipeline is running, you may see its progress under Results.
Individual scripts sometimes rely on files that are output by other scripts, and therefore may not run with default parameters. You may need to input files from the “userdata” folder or files downloaded from the outputs of other scripts to make the scripts run.
After the script runs, you’ll see a detailed Results box, which includes drop down arrows to view your inputs and script outputs. To simply view your output, click on the blue name or arrow. A gray box containing the script logs can be found under the outputs, which can help with debugging problems that occurred.
If you see a red exclamation mark, the script failed to completely execute and an error message will be displayed. If you encounter an error due to the script’s internal structure (i.e. not a problem with your input parameters), please contact us on Discourse or email us at boninabox@geobon.org.
To download outputs, simply click the link next the output name.

To run the script again, click Run script in the input form.
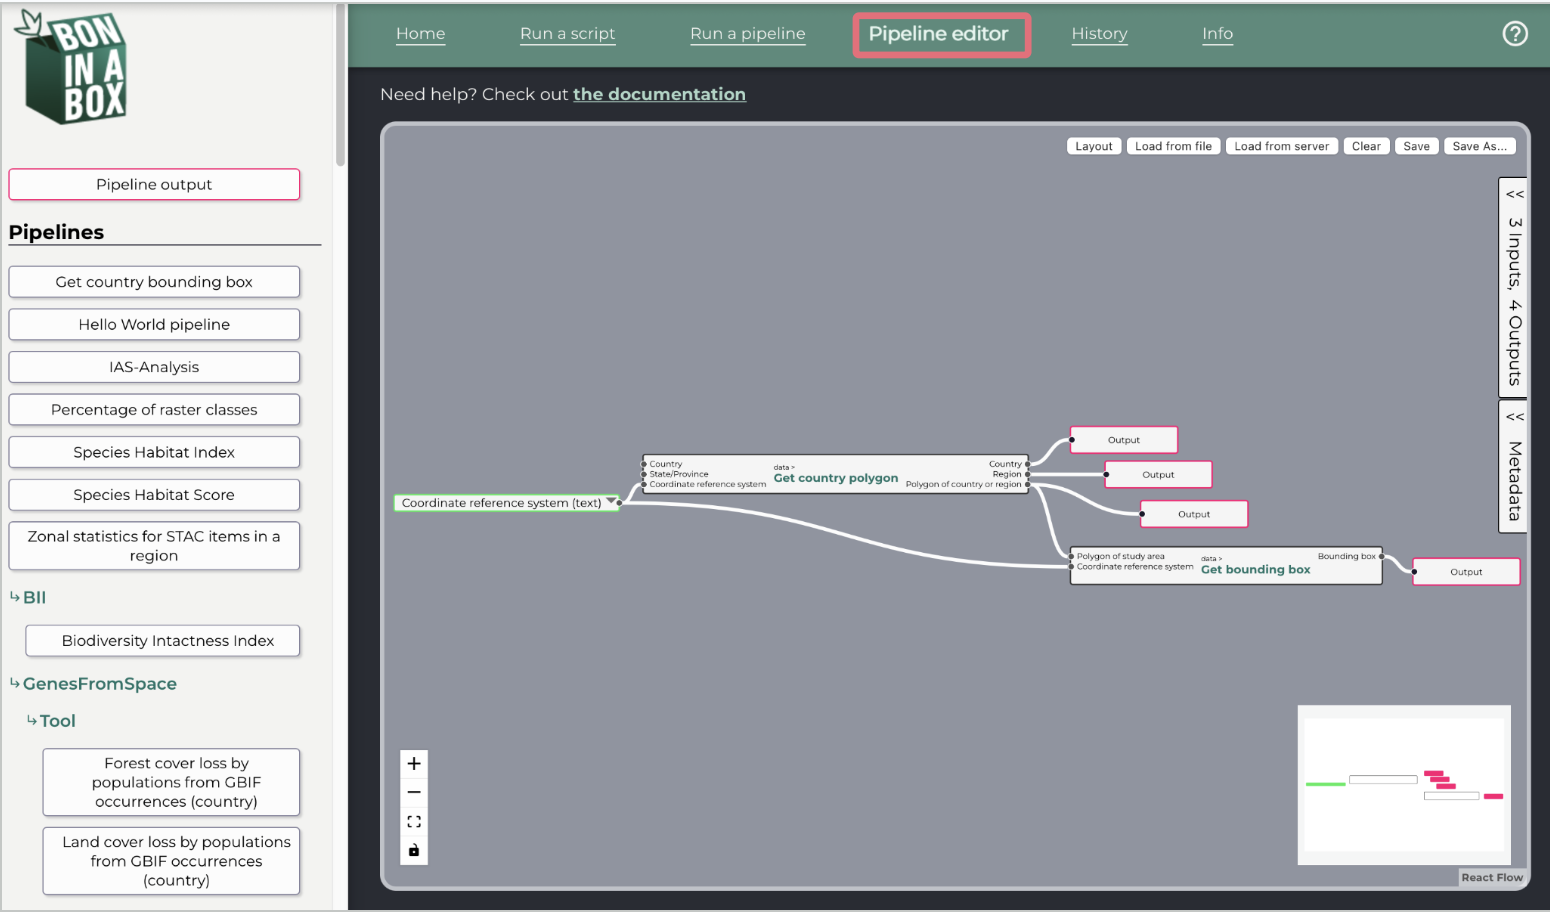
Pipeline editor
Under the Pipeline editor tab, users can create and edit pipelines. For more information on how to do so, please refer to Step 6 “Connect your scripts with the BON in a Box pipeline editor” of the how to contribute page.
History
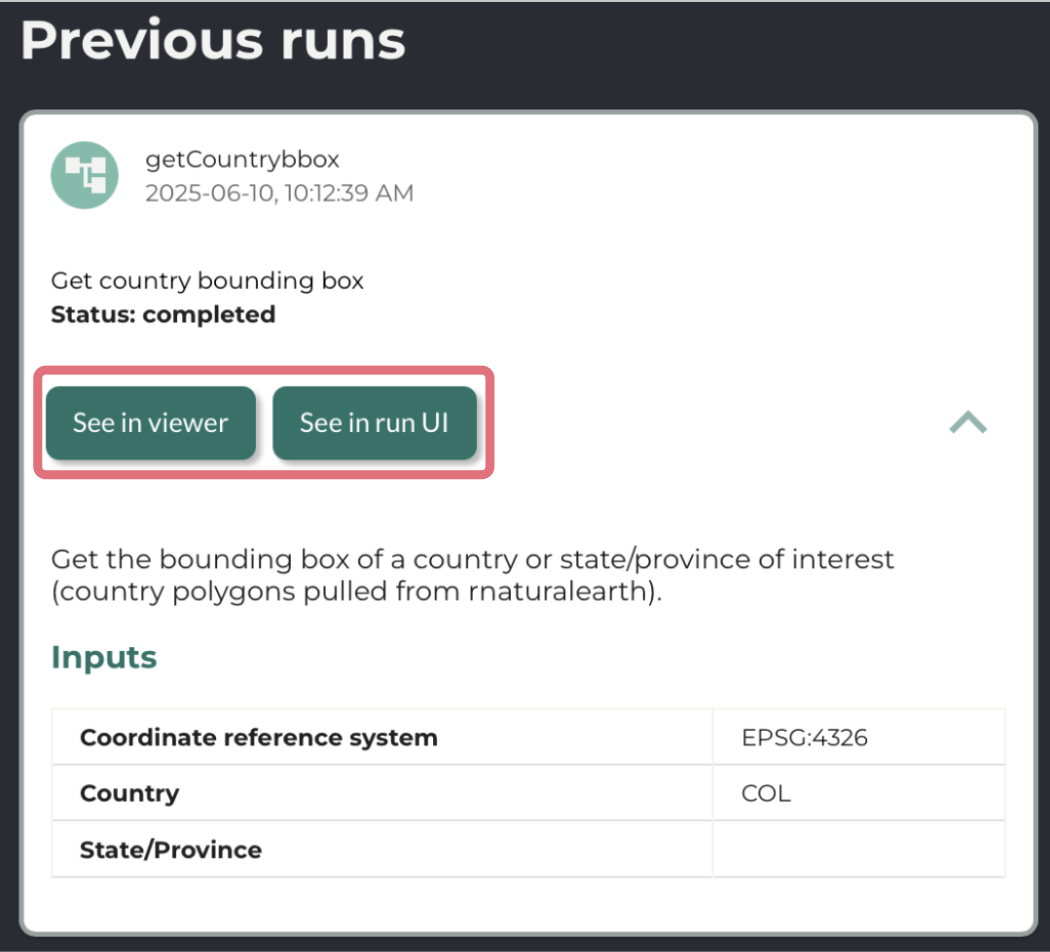
The History tab shows previous script and pipeline runs.
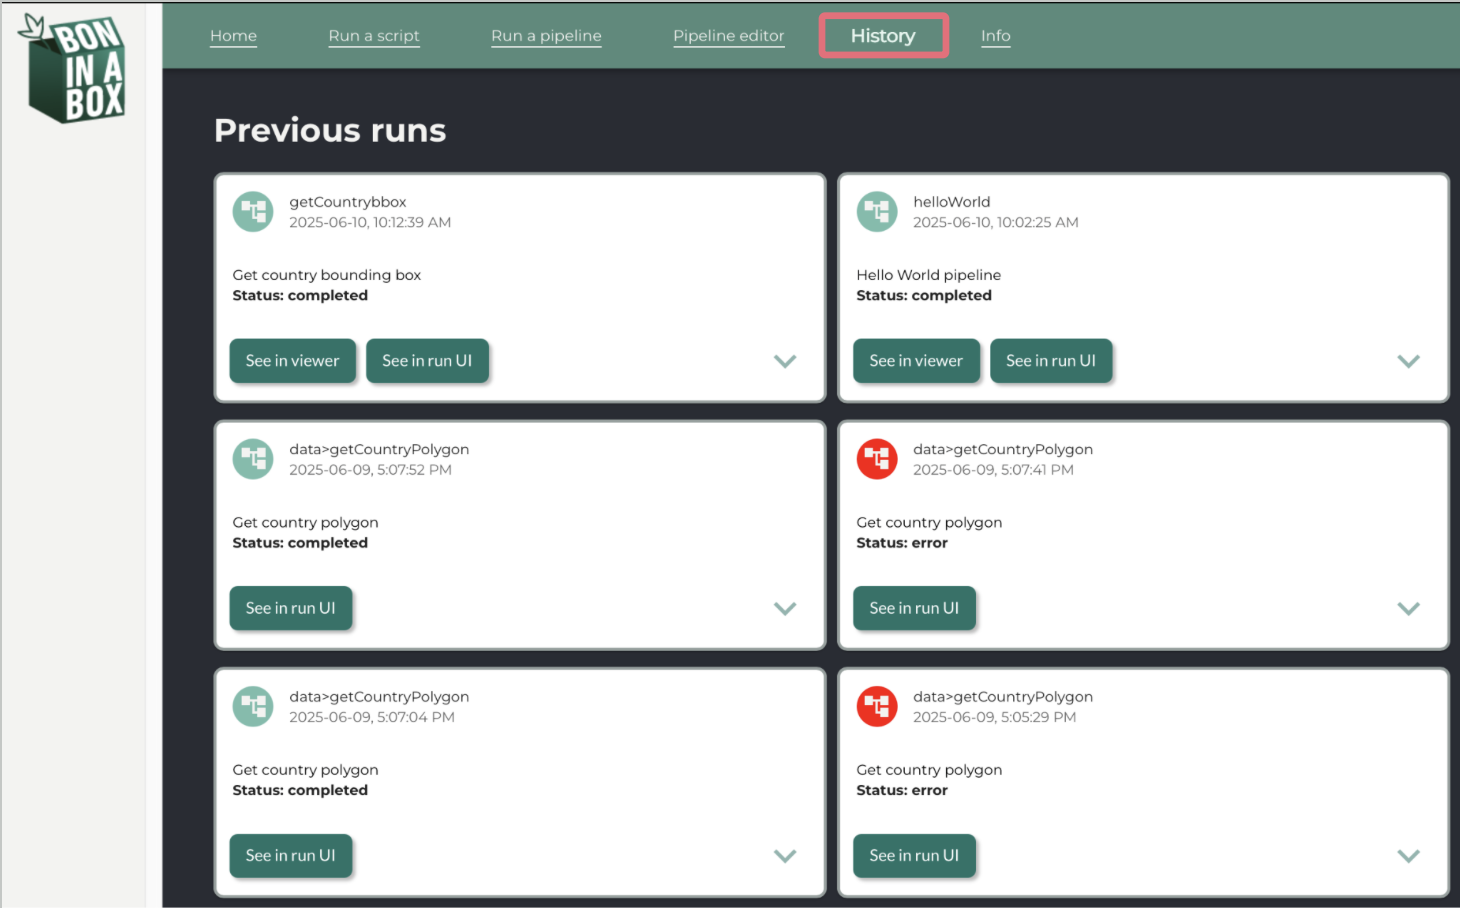
Use the drop down arrow to see the inputs of a run and See run in UI to view the details of a run, including the inputs, outputs, and logs. The latter can be used to try the run again with some or all of the same inputs. For pipelines, you may see outputs in the results viewer using See in viewer.
If you run the same pipeline with the same input parameters multiple times, it will only show once in the history view.
For any further questions, please contact us on Discourse or email us at boninabox@geobon.org.